


Disassemble and fix P6 connector in a Nintendo DS Lite
In this step by step guide, we are going to learn how to change the P6 connector, an internal connector of the Nintendo DS Lite.
Required parts

- 1. Nintendo DS Lite, with damaged P6 connector
- 2. P6 connector. Search for p6 ds lite in eBay
- 3. Soldering Iron (14W), and 0.5 mm tip
- 4. Solder
- 5. Screwdriver
- 6. Philips screwdriver
- 7. Tri-wing screwdriver, for Nintendo hardware. You can buy it from Deal Extreme
Steps
-
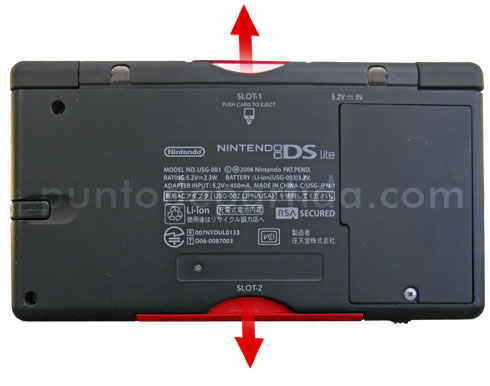
Remove the DS cart, if any (Slot-1). Remove the Game Boy Advance cart lid (Slot-2) -
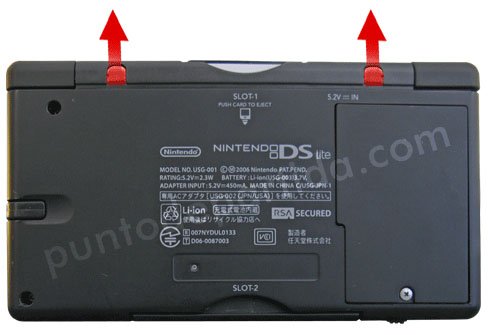
Remove the rubber legs. Use a screwdriver or a cutter to do so. -
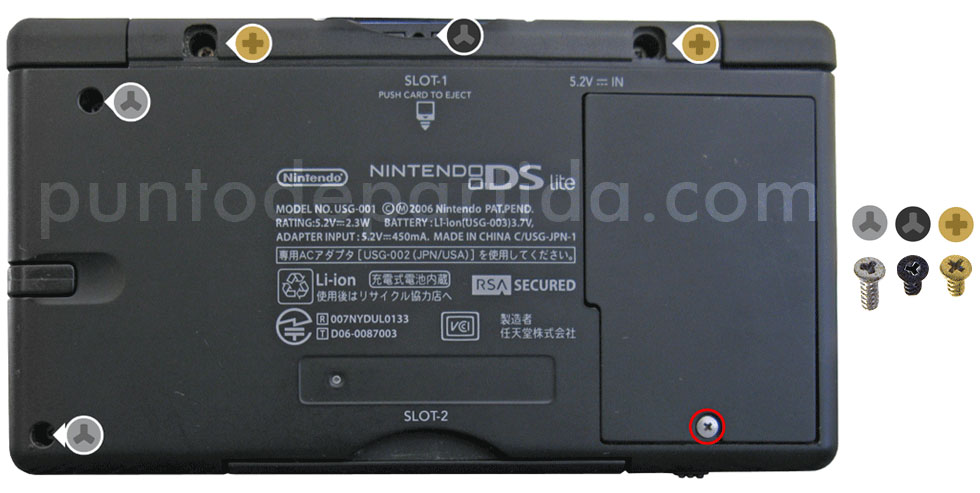
Using the proper screwdrivers, unscrew all marked screws. The one in red is from the battery lid. -
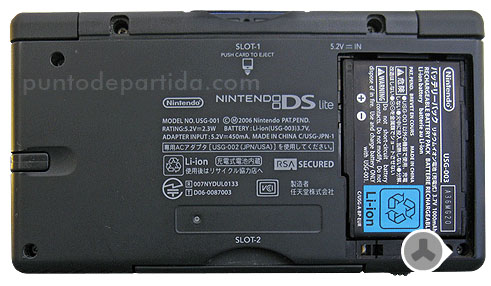
Remove the battery lid and remove the new screw. -
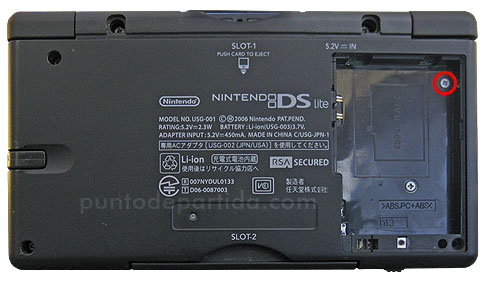
Last screw in red. -
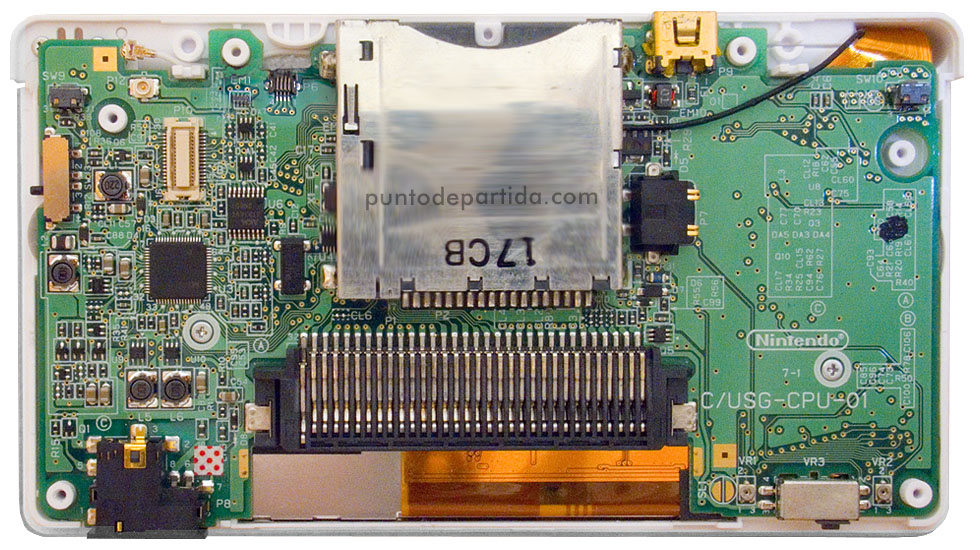
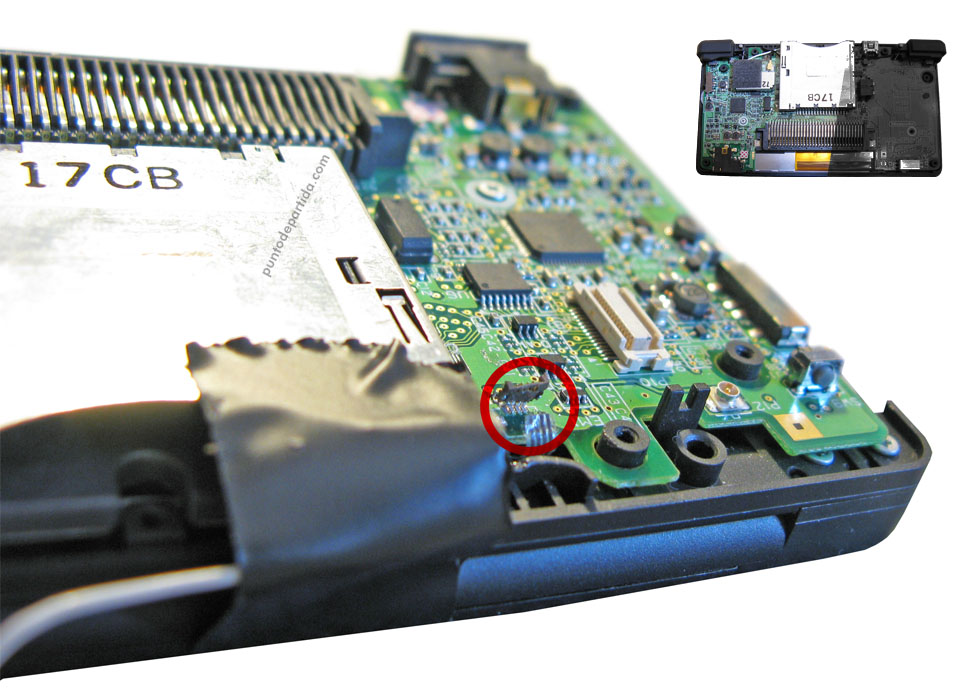
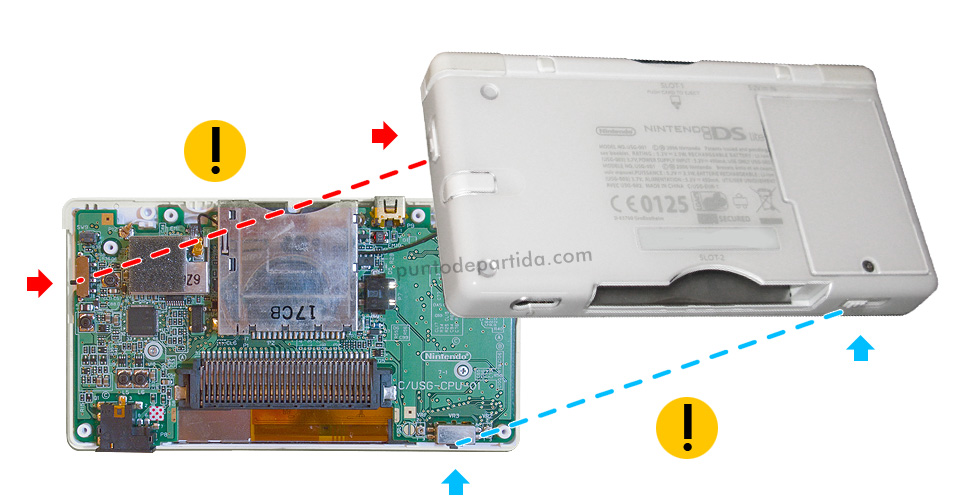
Remove all the DS bottom lid to uncover the console circuits. The red mark is the P6 connector.. -
Remove the L and R buttons, with care. There are two springs, be careful 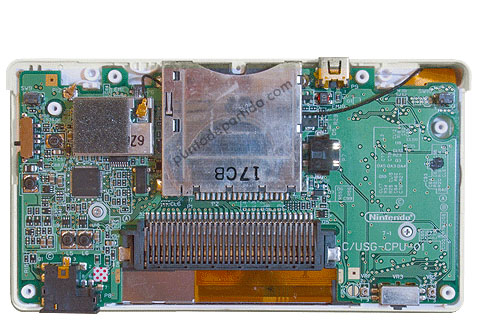
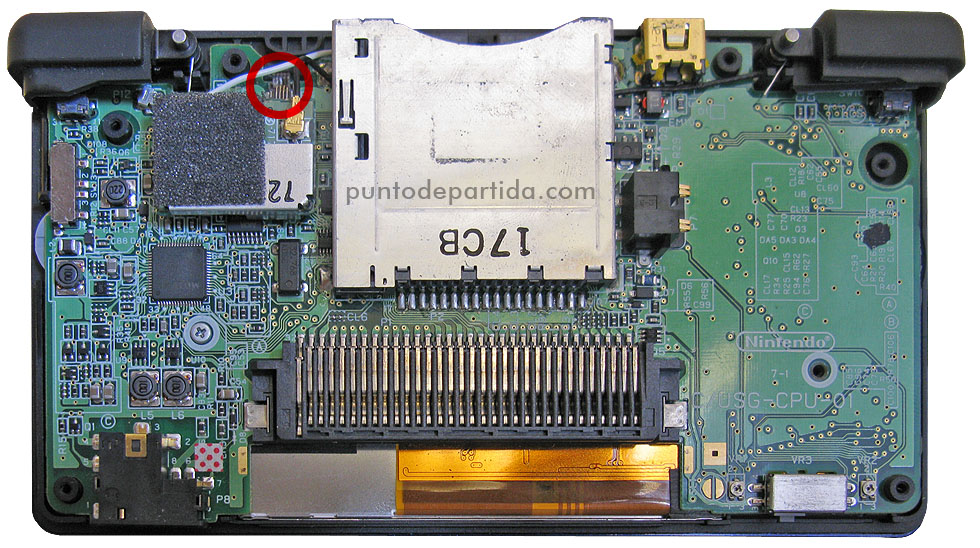
All set -
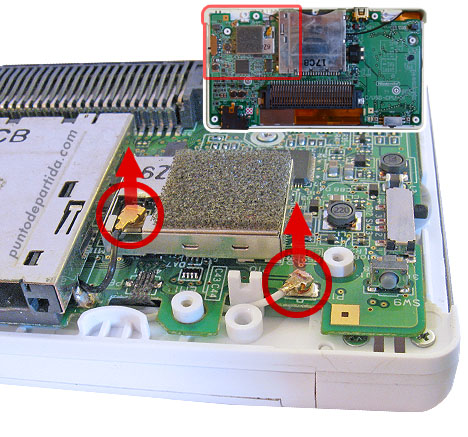
Disconnect the antenna connectors, marked in red. -

Antenna wires disconnected. -
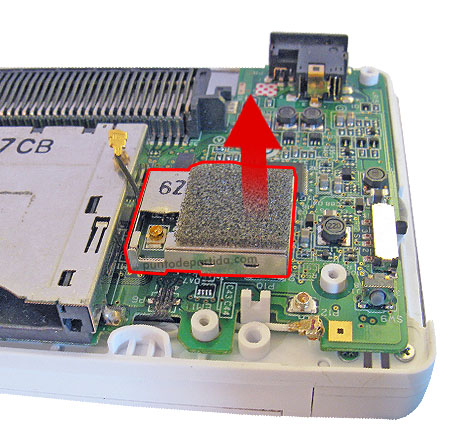
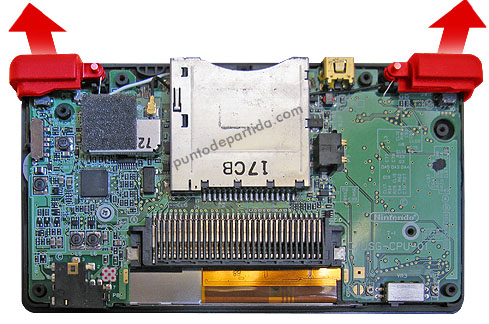
Remove the Wi-Fi module. Pull from the red arrow. -
-
-
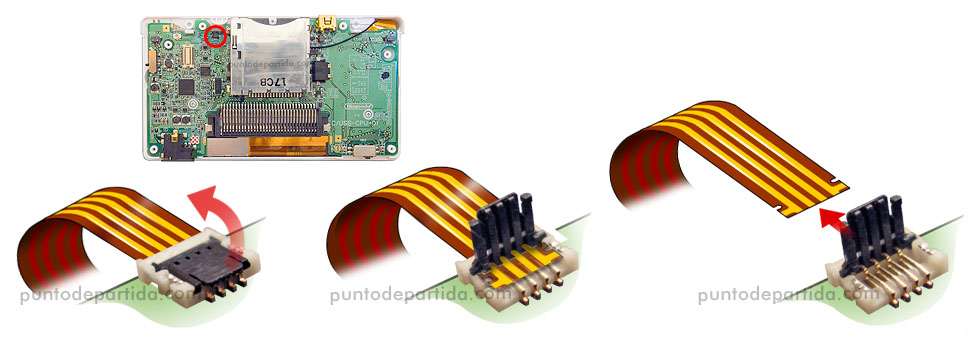
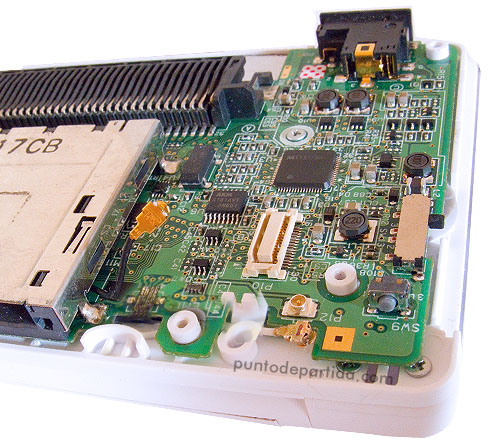
Disconnect the touch screen wire. -
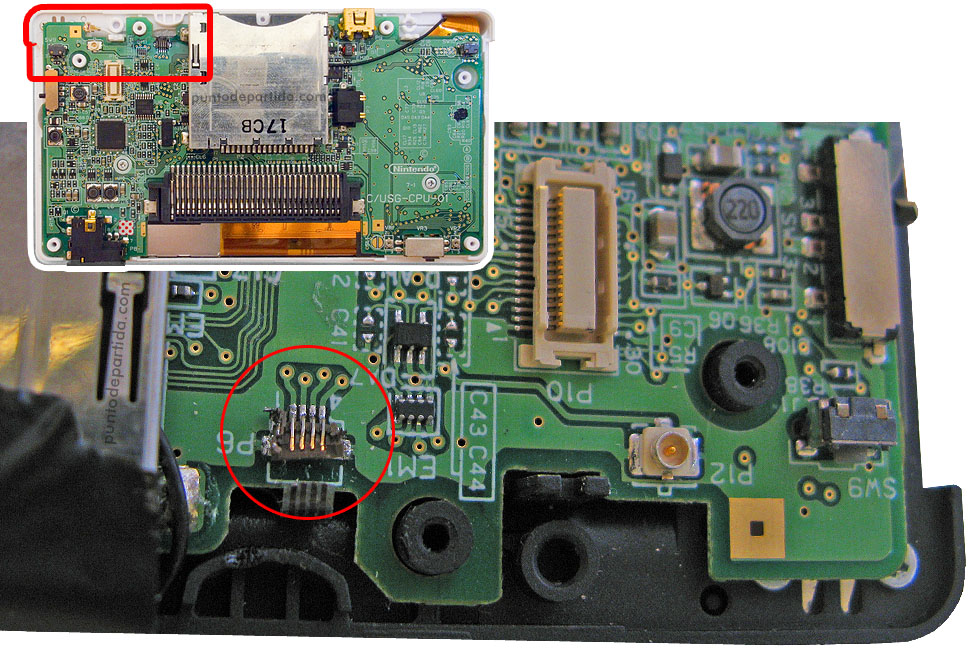
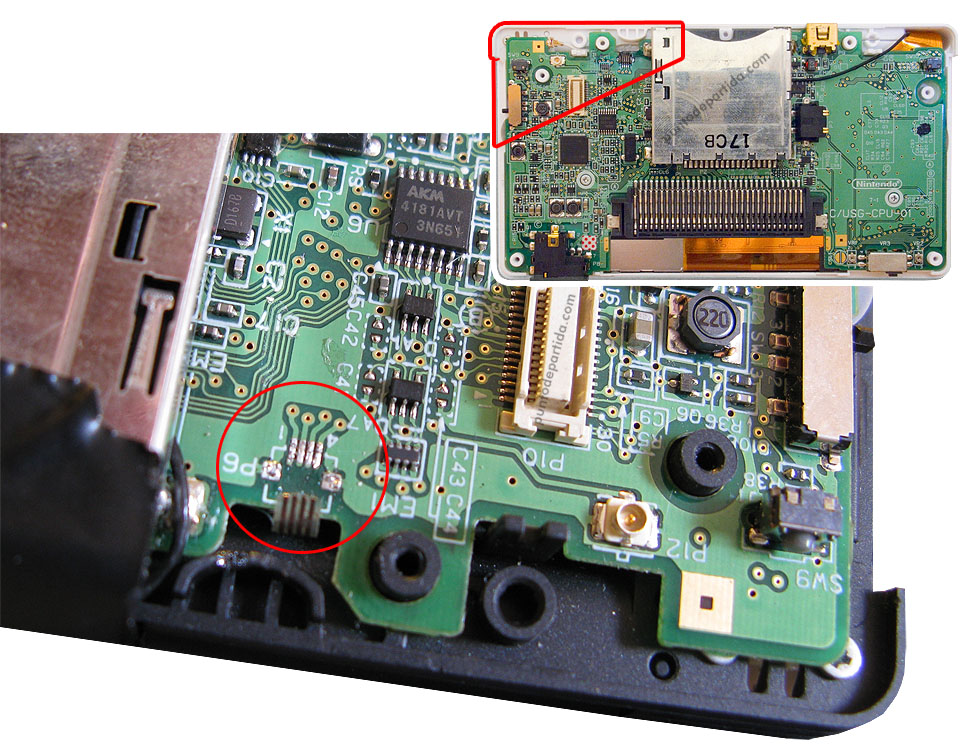
Remove the damaged P6 connector. -
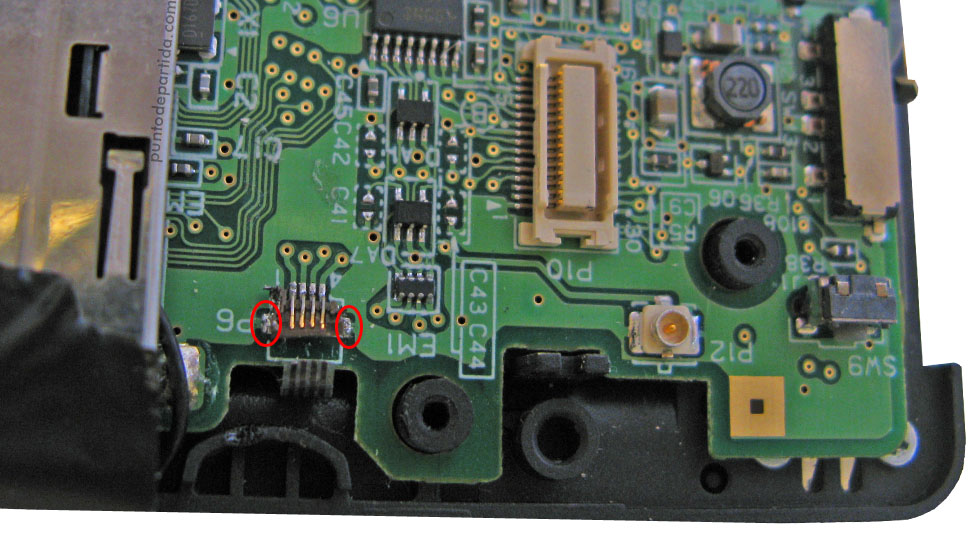
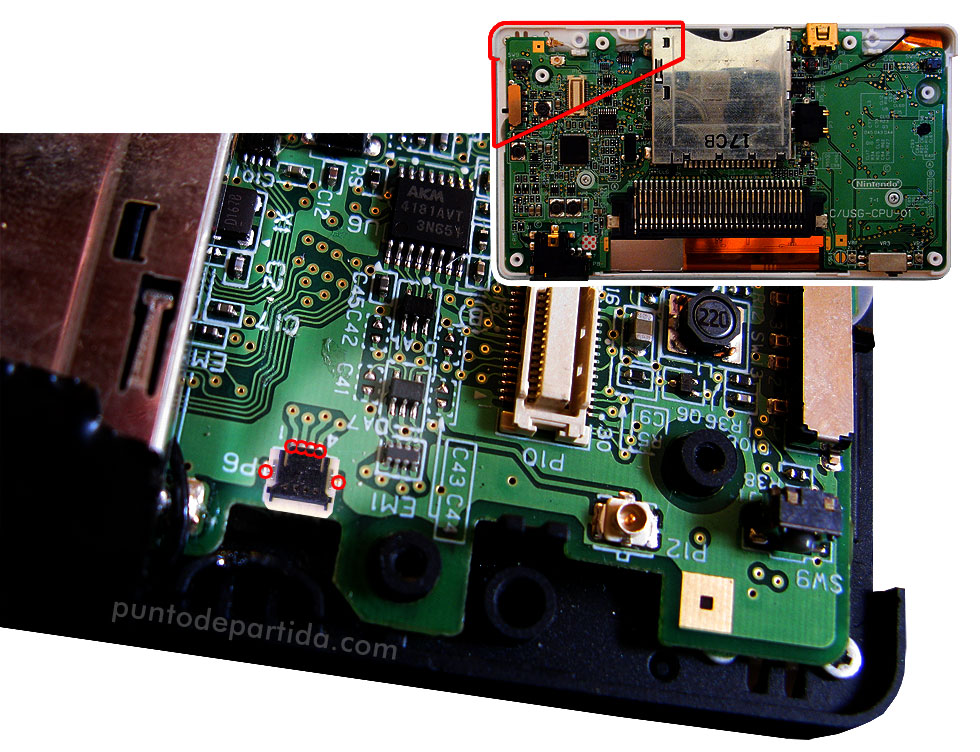
The P6 connector is soldered by six soldered joints. The two side joints (marked in red) are the ones that hold the connector.. -
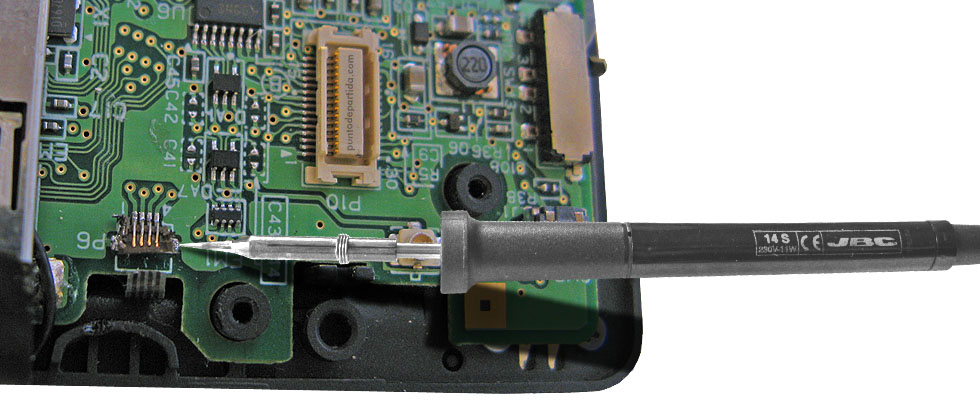
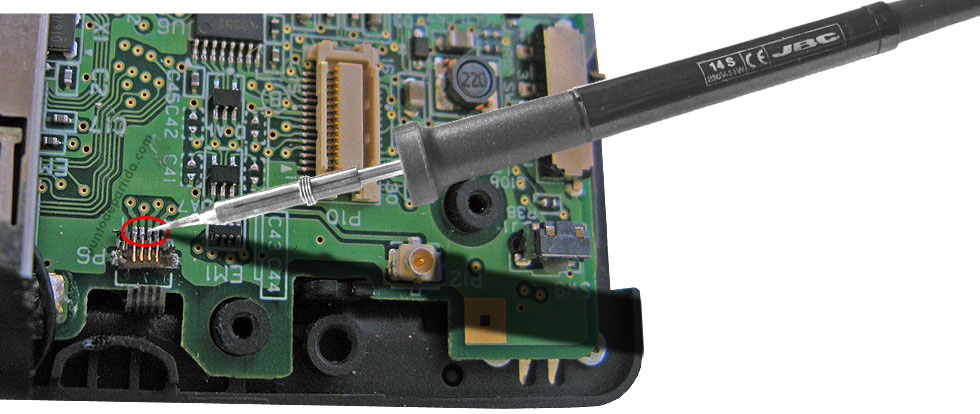
Heat up the soldered joints on the top, and remove the damaged P6 connector. -
-
Put the new connector in place and solder the joints.. -
-
Put the new connector in place and solder the joints. -

Connect the touch screen connector. -
Be careful when you close the console. The volume slider and the power switch must be in the correct place before you close the lid.